

Comprehensive Guide to Asphalt Shingle Roof Repair
Introduction
Maintaining the integrity of your roof is crucial for the safety and longevity of your home. Asphalt shingle roofs are popular due to their durability and cost-effectiveness, but they may require repairs from time to time. In this guide, we will walk you through a detailed process on how to replace missing or damaged shingles to ensure your roof remains in top condition.

Step One: Identifying and Preparing the Damaged Shingle
Before commencing any repair work, it is essential to accurately identify the damaged or missing shingle. Look for signs of wear, tear, or any other form of damage. Once identified, gather all necessary tools and materials for the job. Ensure you have a flat pry bar, roofing nails, and replacement shingles that match your current roof.
Step Two: Safely Accessing the Roof
Safety should always be your top priority. Use a stable ladder and ensure it is securely placed before climbing onto the roof. Wear non-slip shoes and use safety equipment as required. If you are unsure about your ability to safely complete the job, consider contacting a professional roofing contractor in Chicopee.
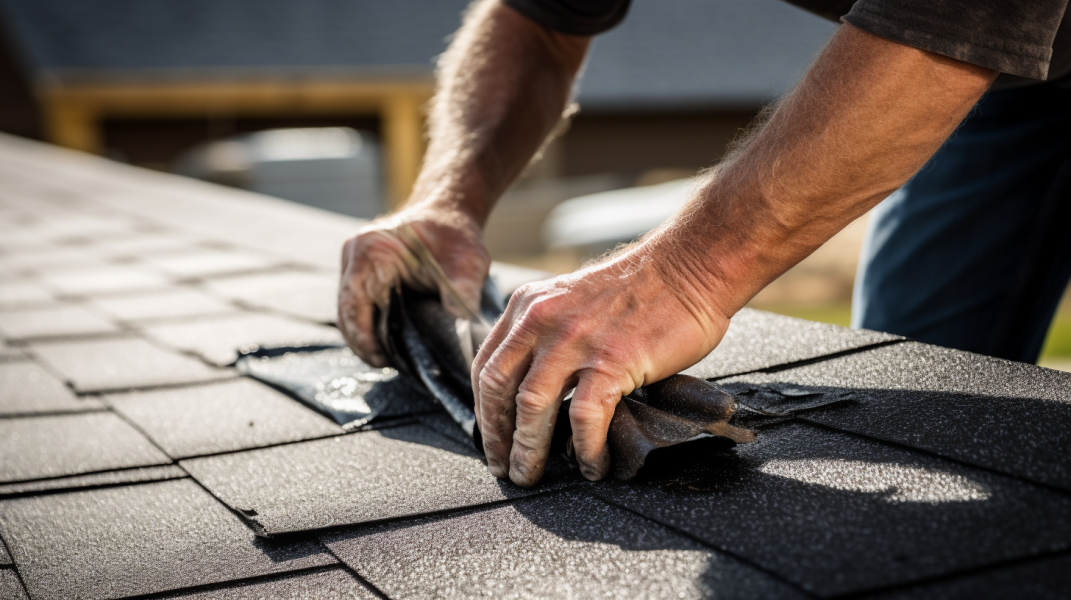
Step Three: Removing the Damaged Shingle
Carefully slide the flat pry bar under the damaged shingle to break the sealant bond. Do this gently to avoid damaging surrounding shingles. Once the seal is broken, remove the roofing nails securing the shingle in place. Be meticulous during this process to ensure no debris or nail remnants are left behind.
Step Four: Preparing the Area for the New Shingle
Inspect the area where the damaged shingle was removed. Ensure it is clean and free from any debris. If there is any residual sealant, scrape it off gently. The surface should be smooth and ready for the installation of the new shingle.
Step Five: Installing the New Shingle
Place the new shingle into the empty space, ensuring it aligns perfectly with the surrounding shingles. Secure it in place using roofing nails. Be careful not to overdrive the nails; they should be flush with the surface of the shingle.
Step Six: Sealing the Shingle
Apply a small amount of roofing cement under the edges of the new shingle. Press down firmly to ensure it bonds securely with the surrounding shingles. This step is crucial as it helps restore the roof’s integrity and prevents wind uplift.
Step Seven: Inspecting Your Work
After completing the installation, take a moment to inspect your work. Ensure the new shingle is securely in place and the surrounding area is free from debris. Regular roof inspections and maintenance are key to prolonging the life of your roof and preventing future issues.
Conclusion
Replacing a damaged or missing asphalt shingle is a task that can be completed with precision and care. By following these detailed steps, you can ensure your roof remains in excellent condition, protecting your home for years to come. If you ever find yourself in need of professional assistance, do not hesitate to reach out to
Nova Home Improvements, a trusted roofing contractor in Chicopee.